Displacement
Find ATR-sized impulse candles, require directional body dominance or an FVG, and carry the latest bullish and bearish imbalance zones forward.
A large candle is not automatically displacement. A long wick can make the total range enormous while the body closes back near where it opened. Real displacement is different: price travels far, the body owns a meaningful share of the candle, and the move often skips an interval between surrounding bars.
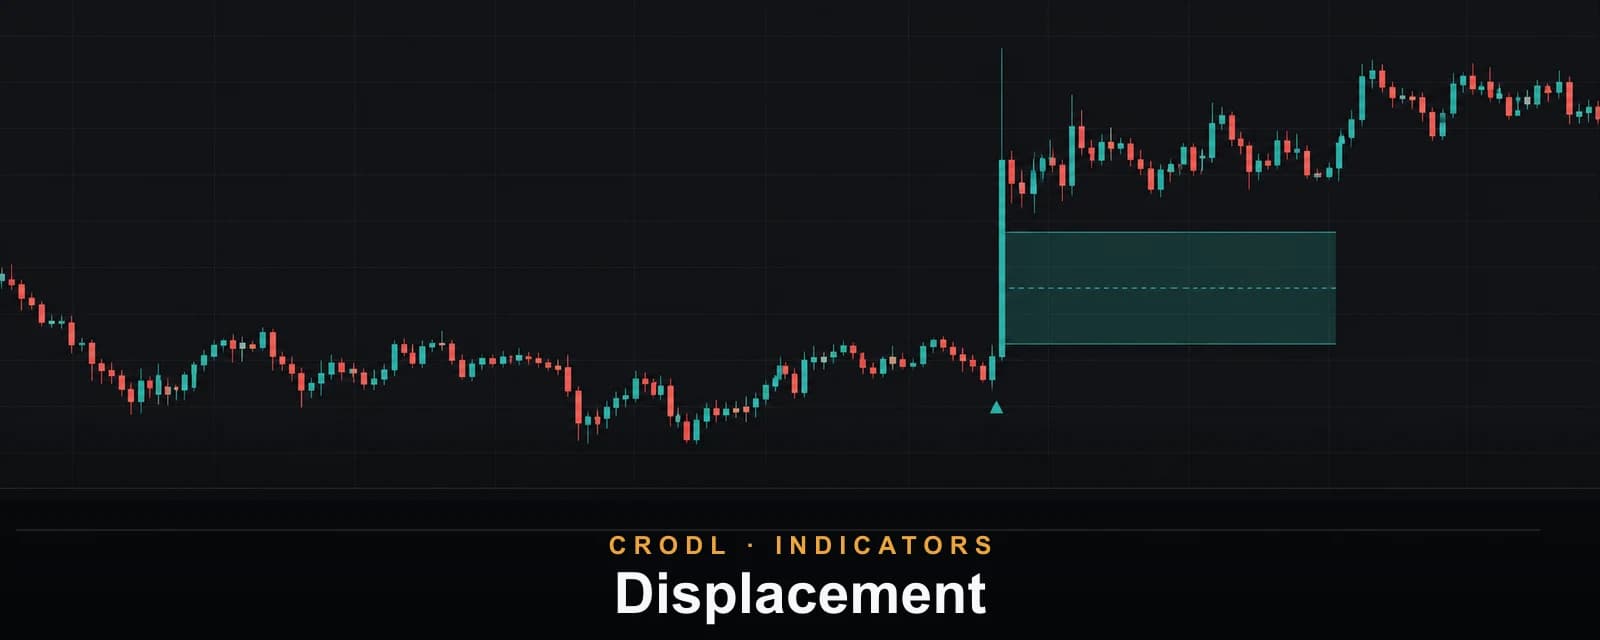
The Displacement indicator on the Crodl terminal turns that definition into an objective overlay. It highlights qualified impulse bodies, marks their direction, and carries the latest bullish and bearish Fair Value Gap zones forward until they are filled or replaced.
The three-part test
A candle qualifies only when all enabled conditions agree:
- ATR size. The absolute open-to-close body must be at least Body ≥ (x ATR) times the selected timeframe's ATR. The default is 1.0 × ATR over 14 bars.
- Body dominance. Body size divided by the full high-low range must meet Body / range ≥, 0.50 by default. This rejects candles whose apparent size is mostly wick.
- FVG confirmation. With Require an FVG enabled, a bullish candle's low must sit above the high from two selected-timeframe bars earlier; a bearish candle's high must sit below the earlier low.
The close must also differ from the open, so a large doji cannot pass.
True multi-timeframe evaluation
The Timeframe input can use the chart or calculate on 3-minute through daily candles. The important detail is that the entire expression runs inside the selected timeframe. A two-bar FVG comparison on 4H compares actual 4-hour candles, not two 15-minute chart bars carrying a repeated value.
Events advance only when a selected-timeframe bucket closes. On a lower chart, a 4H displacement therefore appears when that 4-hour candle is complete and is then projected across the lower-timeframe bars. This is slower than a live guess and much more stable.
How the imbalance zones work
When a qualifying event also creates an FVG, the latest zone for that direction is stored:
- Bullish: from the high two bars earlier to the current low.
- Bearish: from the current high to the low two bars earlier.
The dashed midpoint can be shown as a reaction reference. A bullish zone is considered filled when price reaches its lower edge; a bearish zone fills at its upper edge. With Stop zone when filled enabled, the zone disappears after the mitigation bar. Turn it off to keep the latest zone visible until a newer same-side event replaces it.
The indicator can maintain one latest bullish and one latest bearish zone at the same time. It is not intended to archive every historical imbalance; use the dedicated Fair Value Gaps indicator for that.
Display and alerts
- Highlight the displacement bar paints the impulse body with a translucent directional overlay.
- Show displacement markers adds a triangle at each confirmed event.
- Show latest FVG zones controls the two carried imbalance areas.
- Show FVG midpoint toggles the dashed 50% line.
- Bullish and bearish colors are editable.
Alerts are available for bullish displacement, bearish displacement, any imbalance fill, and side-specific fills.
How traders use displacement
Confirm a break has force
A close beyond market structure is more persuasive when the breaking candle also qualifies as displacement. The structure tool says what broke; displacement describes how decisively it broke.
Wait for the imbalance retest
Chasing the impulse usually gives poor risk. The carried FVG provides a mechanical pullback area, with the midpoint as the first deep-retracement reference and the far edge as full mitigation.
Keep the higher-timeframe impulse visible
Set the calculation to 4H while trading a 15-minute chart. The zone then belongs to a completed 4-hour event and remains visible during lower-timeframe execution, without requiring a second chart.
Frequently Asked Questions
Why did a huge wick not qualify?
The threshold measures the body, then requires the body to dominate the candle's total range. A wick-only expansion is rejection, not displacement.
Can I detect displacement without an FVG?
Yes. Disable Require an FVG. The body highlight and marker can still print, but a zone only exists when the three-candle gap exists.
Does the higher-timeframe mode repaint?
The indicator waits for a new completed selected-timeframe bucket before committing an event or advancing zone state. Closed events are stable.
Separate impulse from spectacle
Add Displacement from the Crodl indicator picker to distinguish candles that merely look dramatic from moves with volatility, directional control, and a tradable imbalance behind them.
This article is for educational purposes only and is not financial advice. Leveraged trading carries substantial risk of loss. Always do your own research and never risk more than you can afford to lose.

Ready to automate your trading?
Connect your exchange, set up automations, and start trading smarter — all from one platform.
Start Trading Free