
Order Blocks
The last opposite candle before a displacement move marks where size was filled. How Crodl detects order blocks with an ATR filter and flips broken zones into breakers.
When a market launches out of a level with real displacement — a candle so large it dwarfs everything around it — somebody with size initiated that move. The footprint they leave behind is unglamorous: the last small candle in the opposite direction, sitting right before the launch. Smart Money Concepts (SMC) traders call that candle an order block — the zone where large players were quietly filling positions before they moved price, and a level they often defend on the first return.
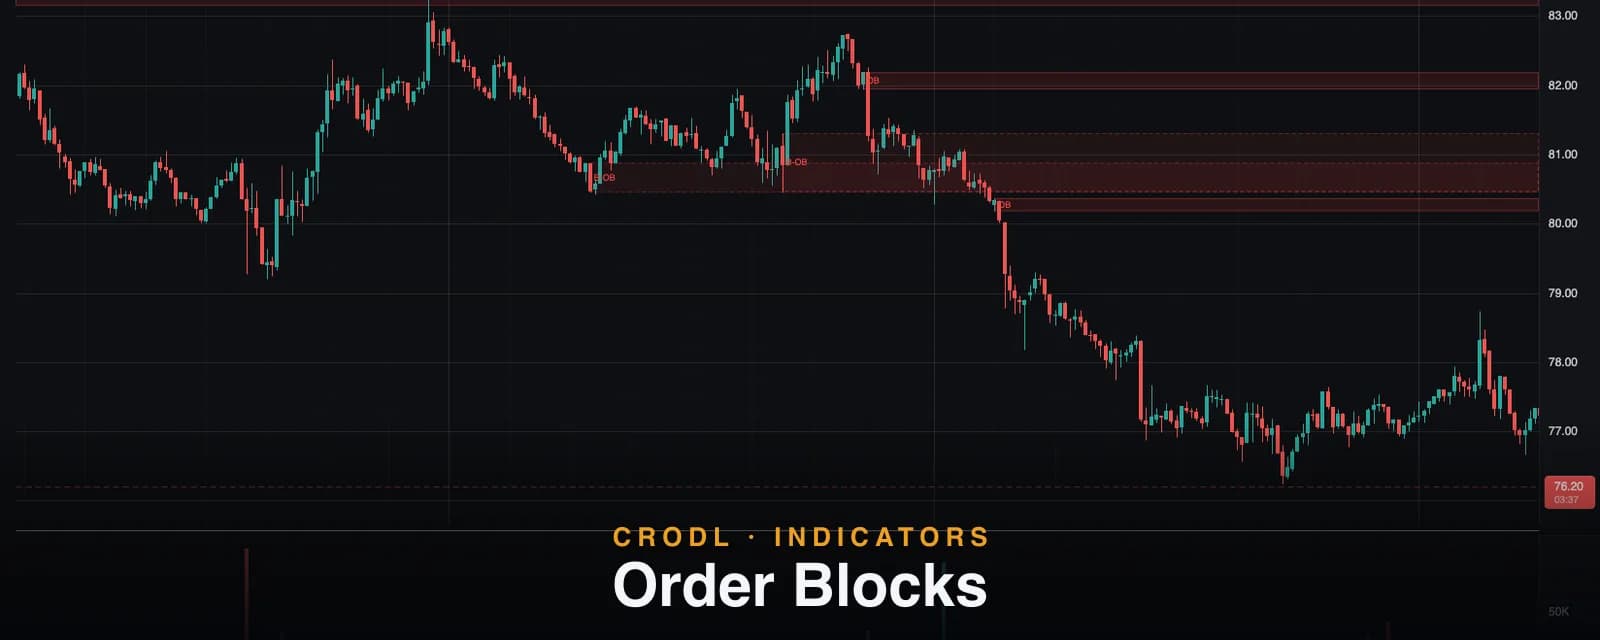
The Order Blocks indicator on the Crodl terminal finds those candles mechanically. It measures displacement against volatility instead of eyeballing "big candles", anchors one block per impulse, and then tracks each zone's full life: untouched, tested, broken — and, if you enable breakers, flipped into a zone for the opposite side. This post covers the concept, the exact detection rules, and the setups traders build on top.
What an order block shows
The theory is simple. To buy in size without destroying your own fill price, you sell a little first — engineering a final down-close — then absorb everything and drive. That last down candle before a violent rally is where the buying actually happened. When price later returns to it ("mitigation" in SMC language), the zone frequently produces a reaction: unfilled orders, defended inventory, and every trader who watched the original impulse now leaning on the same level.
A bullish order block is the last down candle before an impulsive move up — potential support. A bearish order block is the last up candle before an impulsive move down — potential resistance. And when a block fails outright, it does not become irrelevant: the players trapped defending it tend to fight at the same zone from the other side. That failed block is a breaker.
How it works on the Crodl terminal
Detection runs on the chart timeframe, one pass over the candles:
- Spot displacement. A candle qualifies when its body (|close − open|) exceeds
Displacement (x ATR)times the ATR over theATR lengthbars preceding it. Using only prior bars matters: a monster candle can never inflate its own threshold and disqualify itself. - Require a true breakout. The displacement candle's close must clear the opposing candle's full wick extreme — above its high for a bullish block, below its low for a bearish one. Displacement means the move engulfed the entire opposing candle, not just nudged past its body.
- Anchor the block. The nearest opposite-direction candle within the previous 10 bars becomes the block. It is strictly one block per displacement: if the nearest opposite candle fails the breakout test, that impulse yields nothing, and an origin candle is never claimed twice.
- Draw the zone. In the default wick mode the zone spans the origin candle's high to low; in body mode, open to close. The box extends right from the origin candle to the newest bar, tagged
OB.
From there, every closed bar updates the zone's lifecycle:
| State | Trigger | On the chart |
|---|---|---|
| Active | Displacement confirmed | Solid-border box extending right, tagged OB |
| Touched | A wick trades into the zone | Unchanged — a touch alone never removes a block |
| Breaker | A candle closes through the far side | Color flips to the opposite side, dashed border, tagged B-OB |
| Removed | A second close-through back out the near side (or any mitigation with breakers off) | Box leaves the chart |
The breaker flip is the part most tools skip: when a bullish block is closed through, it becomes bearish resistance — dimmer, dashed, and colored for its new role — until a second full close back through the zone finally kills it. Disable Breaker blocks and mitigation simply removes the box.
One honesty note: on the forming candle, lifecycle states are provisional. A mid-bar close-through un-flips if the candle recovers before it closes; everything is final on the bar close.
Settings that matter
- ATR length (default 14) — the volatility baseline displacement is measured against.
- Displacement (x ATR) (default 1.5) — how large a body must be, in ATR multiples, to count as displacement. Raise it to keep only violent impulses; lower it to catch more blocks.
- Zone (default wick) — wick (high–low) or body (open–close) zone width.
- Breaker blocks (default on) — flip mitigated blocks instead of deleting them.
- Max blocks drawn (default 40) — how many live boxes stay on the chart.
- Bull / bear colors — the palette for each role.
How traders use it
Entries at the retest
The bread-and-butter play: after a bullish Break of Structure, wait for price to rotate back into the bull order block that launched the break. Entry in the zone, stop below it, target the next structural objective. The same displacement that mints a block often leaves a fair value gap just above it — a block with an FVG stacked on top is the classic SMC confluence entry.
Breakers as flip zones
A failed bull block is information, not garbage. The buyers who defended it are trapped, and when price returns to the B-OB from below, their exit selling plus fresh shorts often defend it as resistance. Breakers give you a mechanical version of the support-turned-resistance flip.
Filtering by location
Not every block deserves a trade. Bull blocks sitting in the discount half of the current dealing range — where buying is cheap relative to the range — are the textbook ones; a bull block minted deep in premium is a much weaker proposition.
Frequently Asked Questions
Why didn't a huge candle create a block?
Three gates must all pass: the body must exceed the ATR multiple, the close must clear the opposing candle's full wick extreme, and an opposite-direction candle must exist within the 10-bar lookback that hasn't already been claimed by an earlier impulse. Most "obvious" misses fail the wick-clearance test.
Why did a block disappear?
With breakers off, any close through the far side removes it. With breakers on, disappearance means the breaker took its second close-through and died. Blocks also age off the chart once more than Max blocks drawn live boxes exist.
Should I use wick or body zones?
Wick zones include the stop-run tail of the origin candle — wider, more conservative, harder to invalidate. Body zones are tighter and suit aggressive entries with tighter stops. Note that the displacement test itself always uses the wick extreme, so switching modes changes zone width, never which blocks exist.
Does it repaint?
Blocks are minted only when a displacement candle qualifies, and closed-bar history never changes. On the forming bar, a new block or a lifecycle flip is provisional until the close — visible immediately, confirmed when the candle completes.
Map the footprints
Order Blocks is available on every Crodl terminal chart — add it from the indicator picker and every qualifying block and breaker on your pair is drawn and tracked live, alongside trading on six exchanges.
This article is for educational purposes only and is not financial advice. Leveraged trading carries substantial risk of loss. Always do your own research and never risk more than you can afford to lose.

Ready to automate your trading?
Connect your exchange, set up automations, and start trading smarter — all from one platform.
Start Trading Free